Buyers P45AC6 Manuel d'utilisateur
Naviguer en ligne ou télécharger Manuel d'utilisateur pour Pour la voiture Buyers P45AC6. Buyers P45AC6 User Manual Manuel d'utilisatio
- Page / 4
- Table des matières
- MARQUE LIVRES
Résumé du contenu
Quality since 19469049 Tyler Blvd. • Mentor, Ohio 44060Phone (440) 974-8888 • Fax (440) 974-0165Toll-Free Fax (800) 841-8003 • buyersproducts.comB. Pi
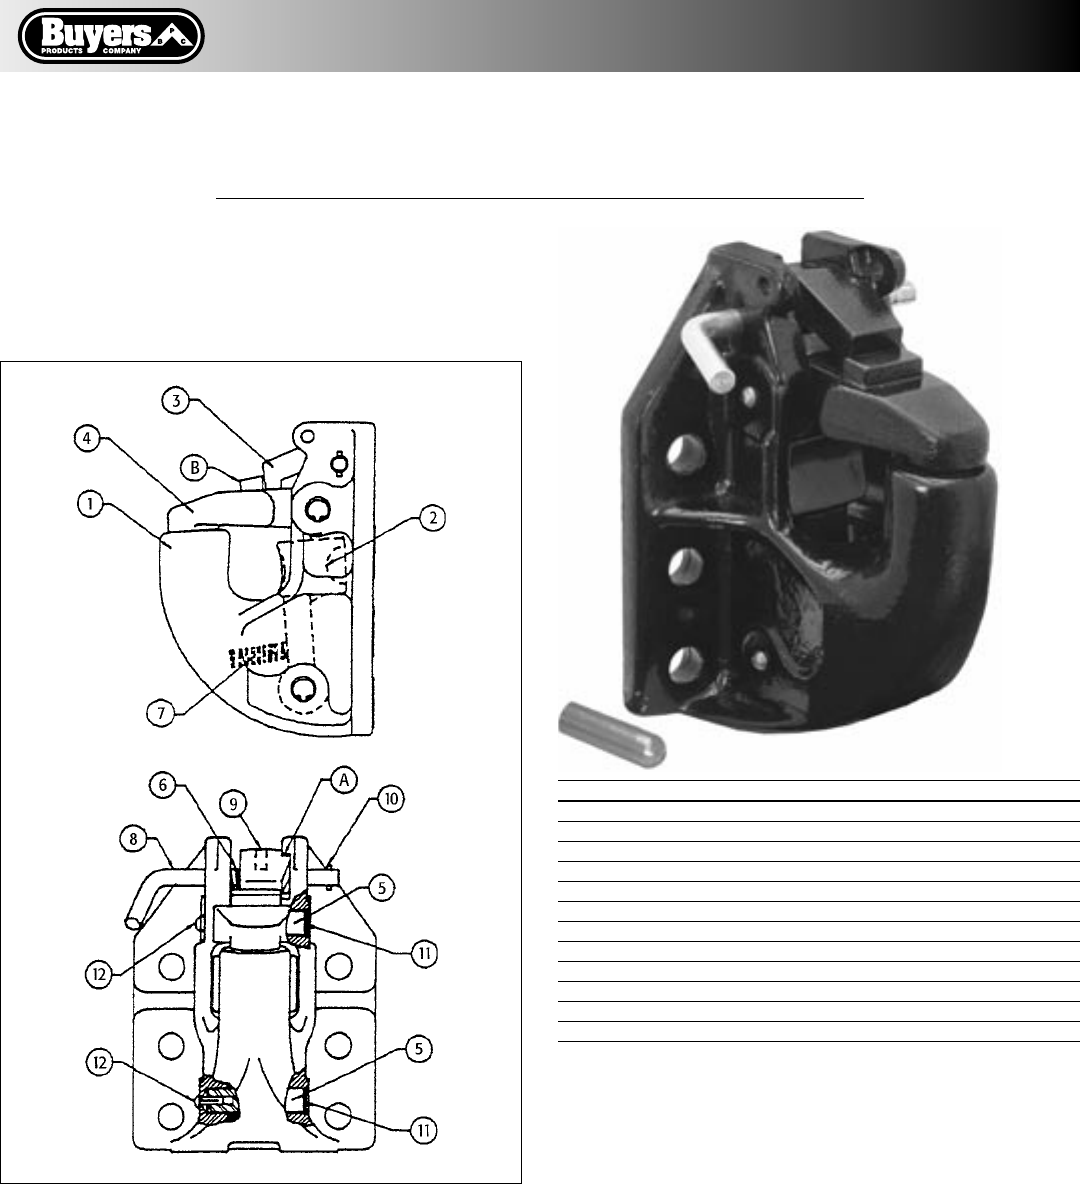
Quality since 19462Fig. 1Fig. 2Fig. 33. If the space exceeds 1/2”, replace the Jaw and Plunger Arm using replacement Jaw Kit C6200 of the Rebuild Kit
Quality since 194622. Remove the Shafts (5) that secure the Jaw (4) and Plunger Arm (2) by removing the head of the Rivets (12) using a cold chisel or
Quality since 19469049 Tyler Blvd. • Mentor, Ohio 44060Phone (440) 974-8888 • Fax (440) 974-0165Toll-Free Fax (800) 841-8003 • buyersproducts.comLOCK
Produits connexes et manuels pour Pour la voiture Buyers P45AC6
 (1 pages)
© 2020, manymanuals.fr. Tous droits réservés | 0.508 s |
 Manymanuals.com
 Manymanuals.de
 Manymanuals.fr
 Manymanuals.it
 Manymanuals.pl
 Manymanuals.cz
 Manymanuals.es
 Manymanuals-pt.com
Commentaires sur ces manuels